
Acoustical Ceiling Repair Tips
If you have an acoustic ceiling, keeping it in good condition is important. Acoustical ceiling tiles come in a variety of textures and designs. Most are made from mineral fiber, which can help reduce noise and echoes. These can absorb sounds, stop echoes, and make rooms sound more pleasant.
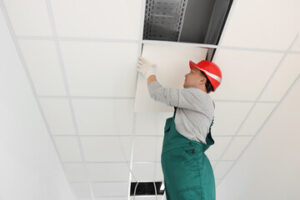 Acoustical ceiling repair is a specialized skill that a professional contractor with experience and expertise in this type of repair should perform. A professional at RAM Builder Services can ensure that the repair is done correctly, that the materials used are appropriate for the intended application, and that the finished ceiling system meets the desired acoustic and aesthetic requirements.
If a water stain or a damaged texture in your acoustic ceiling has caused you to seek a repair option, several options are available. Some can be done in a single step, while others are more complicated. Before tackling a repair, you should ensure the damaged area is free of dust and dirt.
One of the most common damage scenarios for acoustic ceilings is cracked drywall and bubbled or loose texture. To repair this type of problem, mix up a small batch of joint compound, mist the area with water to ensure the compound will set properly, and use a taping knife to apply the compound. You can also use ready-mixed wallboard compound to fix damaged areas if you’re able to find it.
Before you start patching any damage, be sure to tarp the work area by laying down a drop cloth on the floor and covering the ceiling with plastic sheeting to protect furniture and valuables from potential damage. This is especially important for patching a crack in the drywall, which may be located over a hole or a break in the vapor barrier.
Using a spray-on acoustic ceiling texture is an easy way to repair scraped or stained ceilings. These products come in aerosol cans or are applied with a hopper sprayer that works with an air compressor for larger patch areas.
When using a hopper-sprayer to apply ceiling texture, follow the manufacturer’s mixing instructions and hold the hopper approximately 2ft–3ft away from the ceiling. Then move the hopper from side to side, applying thin, even layers until the texture is blended.
The hopper-sprayer method is an inexpensive and easier alternative to the aerosol-can method, plus it allows for the application of different wall textures. However, it is best used on large patches because the sprayer requires more time to blend.
The Homax(r) Popcorn Ceiling Patch is a quick and convenient one-minute repair solution for stained, scraped and damaged acoustic ceilings. The unique EZ Dab applicator tip makes it easy to blend the new ceiling patch into the original surface. It comes in a 7.5-oz can that covers up to 1 sq. ft.
When the drywall in a ceiling gets damaged, it’s not always easy to repair. This is why it’s a good idea to call professionals who have the knowledge and experience to complete the job quickly, safely, and correctly.
Drywall can crack for many reasons, including lumber shrinkage and settling, improper installation or taping, insufficient drywall mud, and moisture from leaks in the roof or walls. However, it is a relatively simple process to fix the damage if you are knowledgeable and have all the right tools.
If you have a crack, first try to assess its location and size. The easiest way to do this is by simply measuring the area from one end of the crack to the other.
Once you know where the crack is, fill it with a drywall filler or mud of your choice. If you are using a putty knife, be sure to apply enough pressure to allow the compound or mud to seep through the mesh drywall tape to fill the entire crack. You can then use a damp sponge to smooth the compound or mud out. Once the drywall is smooth, you can paint over it with your favorite color of drywall paint.
Another option is to spray a thin coating of elastic crack cover-up over the cracked area. This product will help prevent the drywall from cracking again.
When you have a large and discolored crack in your drywall, it can be a sign of water damage or foundation problems. Depending on the extent of the problem, you may need to hire a foundation repair company to come inspect the situation and offer a solution.
In addition to repairing drywall, you can also update your ceiling with decorative trim like crown molding. This is a popular choice for homeowners and is often more durable than traditional wall or ceiling tiles.
If you have an acoustic ceiling in your home or office, water damage can be a major problem. It can cause drywall to fall off, crack, and even disintegrate. It can also leave behind unsightly stains and discoloration.
Fortunately, it is often possible to repair water damage in acoustic ceilings with little difficulty. The key is to find the source of the leak and fix it as quickly as possible. Otherwise, a large amount of drywall or structural damage could result, which would require more extensive and costly repairs.
To begin, determine the origin and extent of the damage from a quick inspection of the area. Water can travel a great distance from the initial point of damage, which makes it difficult to pinpoint its source. This means it’s critical to work out where the water is coming from first, explains Ray Brosnan, contracting expert and co-founder of Brosnan Property Solution (opens in new tab).
Once you have found the source, start by removing damaged drywall that you can see. This will help you find the original location of the leak and make it easier to dry out the space.
Then, patch the damaged section of drywall using a gypsum-based joint paste, says Constellation. This will cover and fortify the repair and ensure it doesn’t crack again.
Next, remove any loose texture around the patched area. You may need to spray the texture with water and use a scraper to soften the texture. This can be done in small areas at a time so that you don’t have to scrape the entire ceiling.
Prime the patched area or the entire acoustic ceiling with a thinned stain-blocking primer. An acrylic primer works best, but oil-based or shellac can be used as well. Thinning the primer 25% will allow it to penetrate through the texture and bond with the underlying drywall.
Before you start painting the repaired area, you’ll want to check that it’s dry. If the ceiling is still wet, you’ll be unable to paint the patched area effectively, and the stain will come back.
Water stains on a ceiling can be quite a pain to deal with, but they’re something that you don’t want to ignore. This is because they can cause serious damage to the ceiling, as well as resulting in poor indoor air quality and mold growth.
The first thing you need to do is find the source of the stain. This can be as simple as a leak in your roof or plumbing pipes, but it’s also possible that you might have an ice dam on your roof or clogged gutters. If this is the case, it’s imperative to get these issues fixed before trying to repair any water stains.
Once you’ve gotten the source of the water stain under control, clean the area with a bleach solution (one part bleach to three parts warm water) to fade the brown ring. This will also help to remove any lingering mildew or dirt that might prevent the primer from bonding with your ceiling.
After you’ve cleaned the ceiling, it’s time to paint it. However, you’ll need to make sure that it’s completely dry before you can paint it.
Before you can start painting, you need to prime over the stained area with an oil-based, mold-resistant, stain-blocking primer. This will ensure that the new paint sticks to the ceiling and doesn’t allow any of the stain to bleed through.
A good primer will have a label that says it’s formulated for use on water stains, so make sure you pick one that is suitable. It will be the best way to ensure that your paint sticks properly and is able to cover up the water stain effectively.
Another important step is to use a drop cloth and safety goggles before you begin your painting project. This will protect the ceiling from dust and other debris while you work, as well as keeping you safe from any spray paint splatters.
The next step is to apply a coat of paint to the ceiling that’s the same color as your ceiling’s original paint. This is important because you’ll need to match the paint to the texture of your ceiling so that the paint blends in well.